This month I want to continue where I left off last time. If you remember I had just finished assembling the worlds most garish wheel, a lovely little rear 48, laced 4 cross and interlaced under the third. But there is a lot more to wheel building than just putting the parts together in the right order. Wheels are very simple, they may look a bit complex, but like all the best ideas they have been with us so long because they are simple and work. Unlike the Government (which seems to think that it makes more sense to continue to pour money into a disastrous policy of smashing apart the very building blocks of the universe to get energy rather than make a small effort to pioneer profitable technology to harvest some of the freely available energy around us in the waves, wind and sun) we can make the most of this simple technology by putting in just a little more effort.
If you hunted out a magnifying glass and built a wheel following last months pictures then you should have ended up with a nice wheel but when you first rode it it will have made quite a lot of “settling in” noises. Little “tings” and “pinks” will have followed you down the street for the first ride and you would soon notice that the spokes had become a little loose and it would need re-truing. Worse than this, if you ride the wheel too hard before it has had a chance to bed-in, there is a higher chance that you will damage the rim or break spokes before the wheel has reached full strength. Any flatspots in the rim acquired now will be with you forever. Remember that most of the wheels strength comes from the spokes, if these are allowed to get too loose the rim alone has very little hope of standing up to even the most gentle riding.
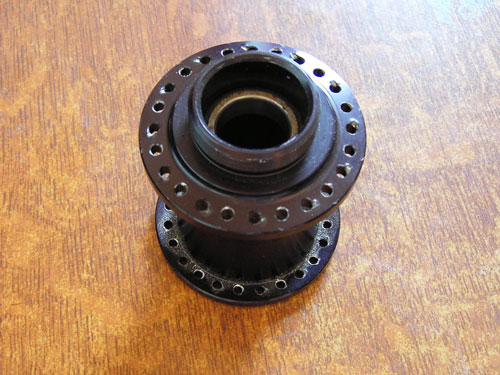
So what is this “bedding in” ? Well, you have probably noticed by now that spokes are relatively hard steel, while most hubs are softer aluminium. If you look at an old hub you can see the marks where the spokes have pulled into the hub flange and made themselves little grooves to sit in. This is quite normal and nothing to be worried about but as it happens the spokes move outwards very slightly and this is equivilent to loosening them off a few turns. You might think that this bedding in happens gradually over the entire life of the wheel but a large part of it actually takes place very early on. As a curved spoke sits against the aluminium of the hub shell it only contacts on a very small area so the force becomes a very large pressure. So like a foot in mud it sinks in slightly. But as the spoke creates a groove, the surface area that the force is spread over very quickly increases so the effect slows right down.

The best wheel builders know that you can reduce these effect and make a stronger longer lasting wheel by “wrestling” with it a little after the build, to artificially bed the spokes in.
So picking up from last month, lets assume that you have just built your new wheel. You have inserted and laced all the spokes and have just finished going round the wheel adding the same numbers of turns to every spoke to get the basic tension on. Hopefully, if all has gone to plan, all the spokes are all at a similar tension and it is pretty much true.
With a few minutes of extra effort we can simulate the first few hours of riding without the risks of a heavy landing damaging the rim.
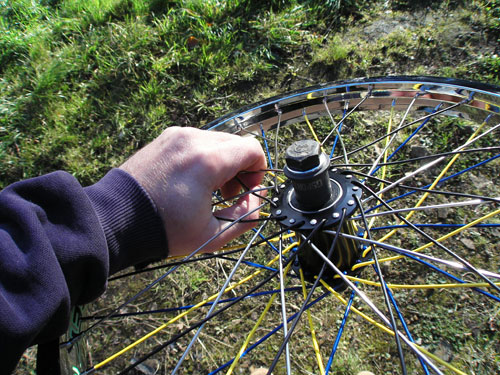
The first stage is to help the crossings settle to their best alignment. To do this simply squeeze the spokes together on one side of the wheel. Grab two “crossings” and squeeze them hard together. The harder the better, you should be able to feel the spokes REALLY digging into your hand. Try not to draw blood but don’t hold back on the wheels account. Work your way around the wheel squeezing like crazy. Go round at least twice. If the wheel noticeably loosens off then go back to the wheel build stage and add more turns (or part turns more like) to ALL the spokes evenly.

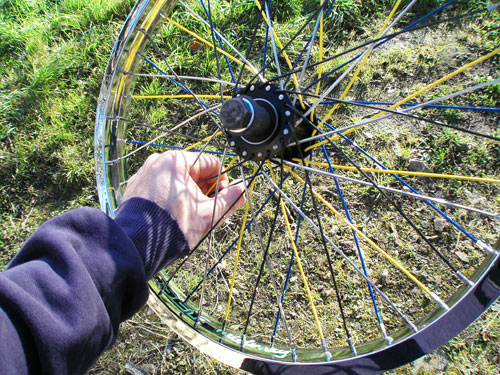
Next we do the same thing but from one side of the wheel to the other. So grab a crossing and the nearest one on the other side and, you guessed it, squeeze like crazy again. Go round at least twice but the more the better.

Again if the wheel has loosened off, go back and add more turns to keep it nice and tight, this shows it is working.
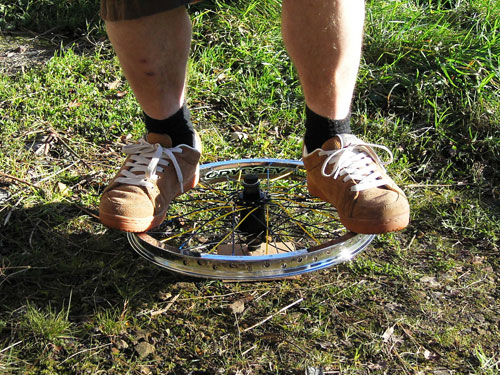
Lastly you can take the option of jumping on the wheel. This is easier said than done but does mimic side impacts really well. To do it you first need to ensure that all cone nuts are done up or wheel nuts/bolts are done up (though not tight) on hubs that use threadless hardware (like G-Sport, Tree, etc).

Then balance the wheel on an old block of wood so that it stays where you put it. The wood IS going to get dented so don’t use your polished hardwood floor or priceless antique sideboard. Once you have it set just jump onto opposite sides of the rim with both feet at the same time. Don’t expect to stay there long, it’s the impact that counts… Infact, expect to fall on your arse, twist your ankle and fall through the telly… Rotate the wheel a bit and repeat. Then turn the wheel over and do the other side too.